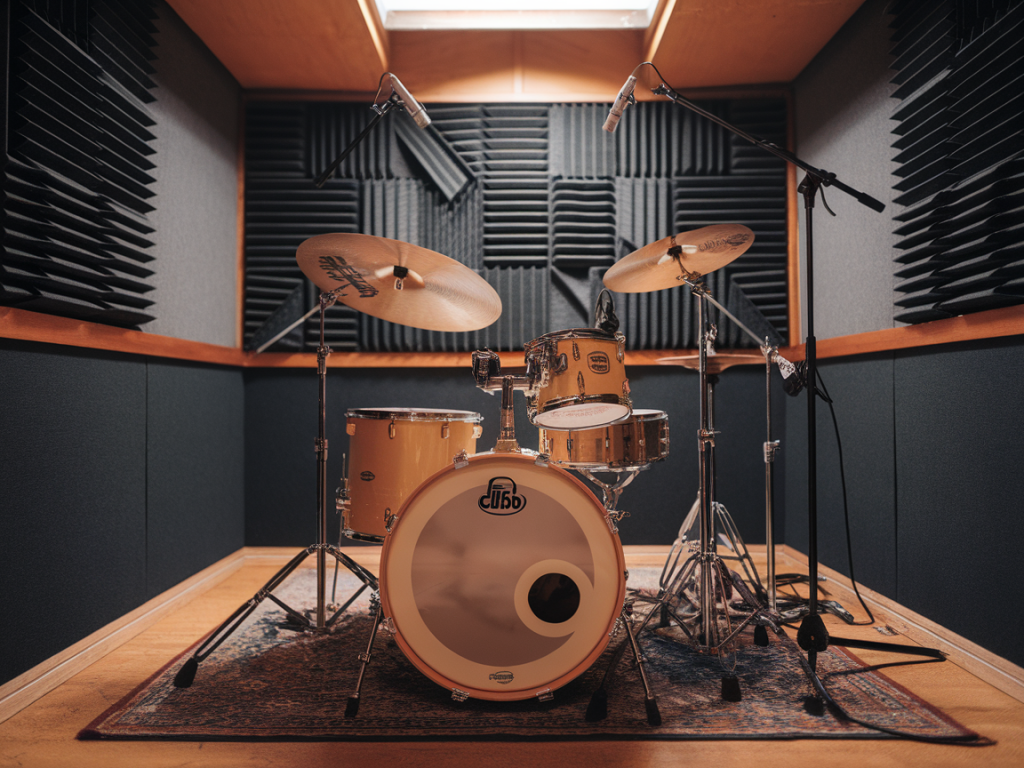
I love the challenge of getting a roomy, vintage 1970s jazz drum sound out of the least likely spaces — like my tiny bedroom. Over the years I’ve learnt that you don’t need a huge live room or an arsenal of mics to capture the warmth and air of an old jazz kit. With a single dedicated room mic, a ribbon stereo pair, and one carefully tuned reverb trick, you can craft a convincing, musical “roomy” character that sits beautifully in a mix.
Why this setup works
Classic 1970s jazz records often used fewer mics and valued natural bleed and tone over isolation. Ribbons bring a smooth top end and a rounded midrange that flatters vintage kits, while a single room mic gives you the illusion of space and depth. The reverb trick ties everything together and lets you control the perceived distance without adding unwanted combing or boxiness from small room reflections.
Gear and prep
Here’s what I typically grab before I set up:
Single room mic: large-diaphragm condenser in omni or a warm cardioid LDC (e.g. Neumann U87, AKG C414, or a valve mic if you have one).Ribbon pair: vintage-style figure (Royer R121 pair or AEA R84/ R88 in a spaced ORTF-ish array) — these tame cymbal harshness and add body to the kit.Close mics optional: 57 on snare, a small capsule on the hi-hat, and maybe one on kick if needed. But the article focuses on the room/ribbon + reverb approach.Quiet preamps with good headroom, a simple interface, and some blankets/gobos to tame first reflections.I’ll often test the kit acoustically before miking — tune the toms and snare to be musical with the room, damp if necessary with tape or gel, and position the kit so the ride/hi-hat faces the quieter side of the room (away from a loud wall). In a bedroom, positioning the kit slightly into a corner can exaggerate low-end — so pull it out a foot or two from the wall if you want less boom.
Mic placement: step-by-step
My goal is to capture a usable stereo image from the ribbon pair while letting the single room mic provide depth. Here’s how I do it.
Place the ribbon pair as the primary stereo image: a spaced pair about 1–2m in front of the kit, centered on the drummer’s chest. For a Royer pair I’ll usually have them pointing slightly down and aimed between the snare and ride to balance stick detail and cymbals. If space is tight, move them inwards but keep them at least 1m away to avoid sounding too close.Single room mic placement: I make this the “distance” mic. Put the LDC (in omni or relaxed cardioid) behind the drummer, about 2.5–4m away if possible, slightly higher than the drummer’s head and angled back toward the kit. In a tiny room that distance will be constrained; the trick is to place it where the direct-to-reflection ratio feels natural — often at the foot of a bed or near a doorway where reflections are less fluttery.Angle and polarity: Point the room mic to capture more of the floor and cymbals rather than a reflective wall. With ribbons, aim to capture a balanced stereo spread rather than isolate each drum. Experiment with small angle changes; 10–20 cm shifts can change the perceived room size a lot.Phase check: Record a short loop and check phase relationships. Flip polarity on the room mic or the ribbons; sometimes the room mic will be out-of-phase with close sources. Time-alignment in your DAW (moving the room mic’s waveform a few ms) can dramatically tighten the image without losing space.What to listen for during tracking
Listen for:
Natural decay of cymbals — ribbons will soften the top and make ride/choke sound musical.Snare body — ribbons add a rounded mid that can replace an overly bright close snare mic.Room coloration — if the room mic sounds boxy, move it away from the offending wall or raise it higher to focus on air over slapback reflections.Mixing — the core trick
Here’s the single reverb trick I use to manufacture the 70s vibe while controlling small-room nastiness.
Keep the room mic largely dry in terms of reverb. Instead, send a mono or slightly stereo reverb from a buss that feeds only the drum tracks (close mics and ribbons) — but crucially, I send this reverb through the room mic’s channel as an insert on a sub-buss or via a pre-fader send. Why? Because you can then compress and EQ the room mic with the reverb embed to read as an integrated space source rather than a separate digital sheen.Choose a warm plate or chamber emulation (or a spring/plate model if you want vintage flavour). Plate with moderate decay (1.2–2s) and short pre-delay (20–30ms) gives that 70s distance without blurring the attack. If you’re using convolution, pick a medium-sized plate or a small chamber with subtle tail.High-pass the reverb send above 150–200Hz and low-pass around 8–10kHz. This keeps the reverberant field airy but not sizzly.Use the room mic as the primary carrier for the reverb: blend the reverb-treated buss underneath the room mic channel so it feels like the room mic is capturing the reverb rather than drowning the direct sound in plugin reverb. In practice, I mute the reverb return and listen only to the room mic with the reverb send to dial the balance, then bring the ribbons and close mics back in.Compression: lightly compress the room mic buss (3:1, 2–4 dB gain reduction) to glue the ambience. A slow-ish attack and medium release preserves transients and makes the room feel lived-in.Automation is your friend: bring more room/reverb in for cymbal rides and rubato passages, less for busy comping sections where clarity is needed.EQ and character tweaks
On the ribbons, I’ll often cut a narrow notch around 250–400Hz to remove boxiness, and gently shelf down above 8–10kHz if the cymbals are too present. For the room mic, a gentle cut at 300–500Hz can remove muddiness, and a boost around 6–10kHz adds air without harshness. Use subtraction rather than heavy boosting.
Common problems and fixes
Boxy room mic: raise it, move it off-axis from the nearest wall, or add absorption between mic and offending surface.Too much cymbal glare: move ribbons slightly further, decrease high-shelf on ribbons, and tame top-end on the reverb send.Phase smear: time-align ribbons and room mic in your DAW. If that fails, invert polarity on one of the channels and listen.A final practical checklist before you hit record
| Quick level check | Room mic peak ~ -12 to -6dBFS, ribbons slightly hotter |
| Phase | Flip polarity and nudge timing if necessary |
| Reverb send | Set pre-delay 20–30ms, HPF 150–200Hz, LPF ~8–10kHz |
| Compression | Light glue on room buss 2–4dB |
| Automation | Plan spots to increase room/reverb for solos and rubato |
Working in a tiny bedroom forces you to make decisions rather than hide behind processing. The ribbon pair gives you the vintage sheen and stereo picture, the single room mic builds believable depth, and the reverb-as-room trick lets you control '70s-style ambience without embracing every small-room reflection. Treat the kit like an instrument in a small, intimate space rather than trying to fake a cathedral — the results are often more musical, and beautifully suitable for jazz.