I often get asked how to capture brushed jazz on a small, budget kit without fancy microphones or dozens of channels. I’ll be honest: a good performance and a sensible room matter more than expensive gear. That said, with a matched pair of Rode NT5 small-diaphragm condensers and a single Shure SM57, you can record beautifully expressive brushed jazz that sits in the mix with warmth and detail. Below I’ll walk you through exactly where I place each mic, why I place them there, and the processing and recording choices that make the sound translate.
What I’m trying to capture for brushed jazz
Brushed jazz is about texture, subtlety and the interplay between cymbals, snare brushes and the ride feel. I’m aiming for:
My microphone choices and why they work
Rode NT5 (matched pair): Small diaphragm condensers are excellent at capturing transient detail and cymbal shimmer. Because they’re a matched pair, they lend themselves to stereo techniques that preserve phase coherence — crucial when you only have a couple of mics to create a full drum sound.
Shure SM57: The workhorse dynamic. It doesn’t have the extended high-end of a condenser, but it’s great for focused snare body, rim tone and for handling brush articulation near the rim. It’s also forgiving in untreated rooms and cheap preamps.
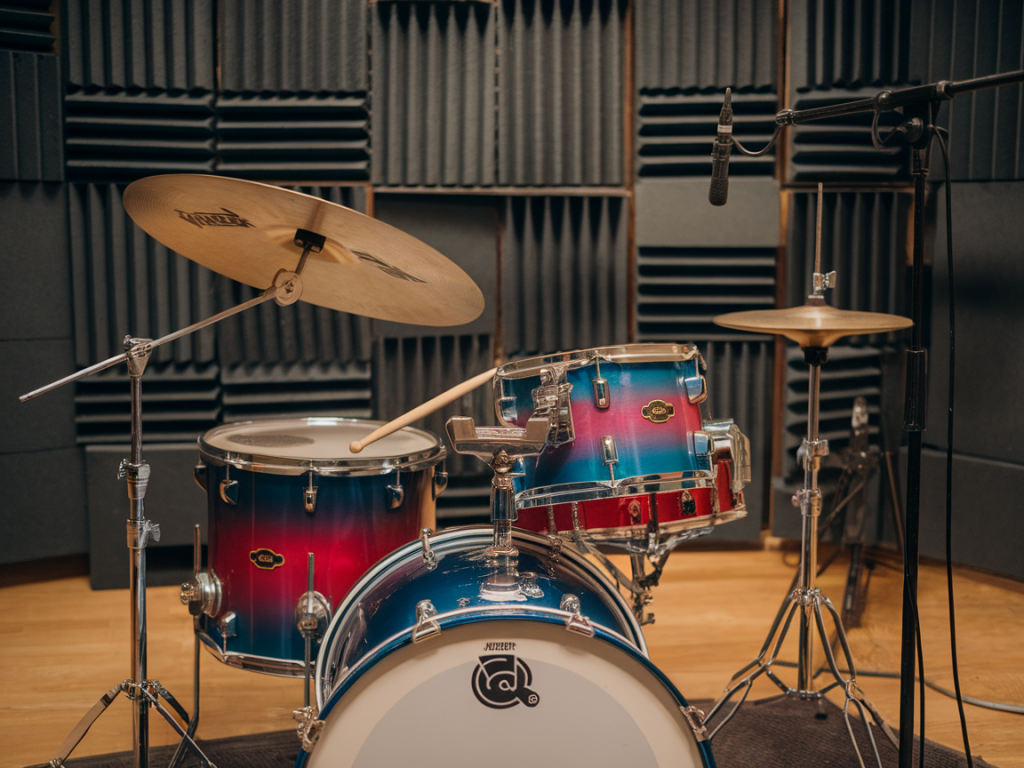
My typical mic setup on a budget kit
Here’s my go-to layout when I have two NT5s and one SM57 to record a brushed jazz session on a small kit (typically 20" bass, 12" rack tom, 14" floor tom, 14" snare):
| Mic | Placement | Distance/angle | Purpose |
|---|---|---|---|
| NT5 (L) | Overhead, left of kit, above ride cymbal | 18–24" above cymbal, angled towards ride, 45° down | Capture ride detail, left-side cymbal, stereo image |
| NT5 (R) | Overhead, right of kit, above hi-hat/snare area | 18–24" above snare/hat, angled towards snare, 45° down | Snare body, brush articulation, right-side cymbals |
| SM57 | Spot on snare (cardioid) — just off axis | 2–4" from rim/head, slightly angled towards centre of head | Add body/attack from brushes and rim detail |
A couple of notes: if you can mount the NT5s in an ORTF configuration, that’s my preferred stereo technique for a natural jazz spread; if you only have two separate stands, place them symmetrically above the kit to avoid a lopsided image. Keep the NT5s low enough to capture the kit as a unit but high enough to reduce direct cymbal overload. For the SM57, avoid pointing straight at the head – a slight angle reduces harsh stick transients and captures rim-slap from brushes nicely.
Distance, polarity and phase — the technical checks I always do
Phase problems are the enemy when you rely on a small number of mics. I always:
Room and kit prep on a budget
Small kits and untreated rooms require small interventions:
Preamp, gain staging and interface tips
Gain staging matters more than fancy plugins. I set preamps so peaks sit around -6 to -10 dBFS on the loudest hits. Small-diaphragm condensers like the NT5s need a clean gain boost, so favor a preamp with decent headroom. If you’re using a basic audio interface, engage the +48V phantom for the NT5s and keep the SM57 gain high but not clipping.
EQ, compression and reverb — how I treat these mics
I keep processing musical and light for brushed jazz:
Common problems and quick fixes
Final workflow tips I use in the studio
With the Rode NT5 pair and an SM57 you can capture a warm, intimate brushed jazz drum sound on a budget kit. Get the placements right, check phase, do minimal but musical processing, and focus on the drummer’s touch — the rest follows. If you want, I can draw up a microphone grid diagram based on your specific room and kit dimensions or suggest exact preamp settings for your interface model.