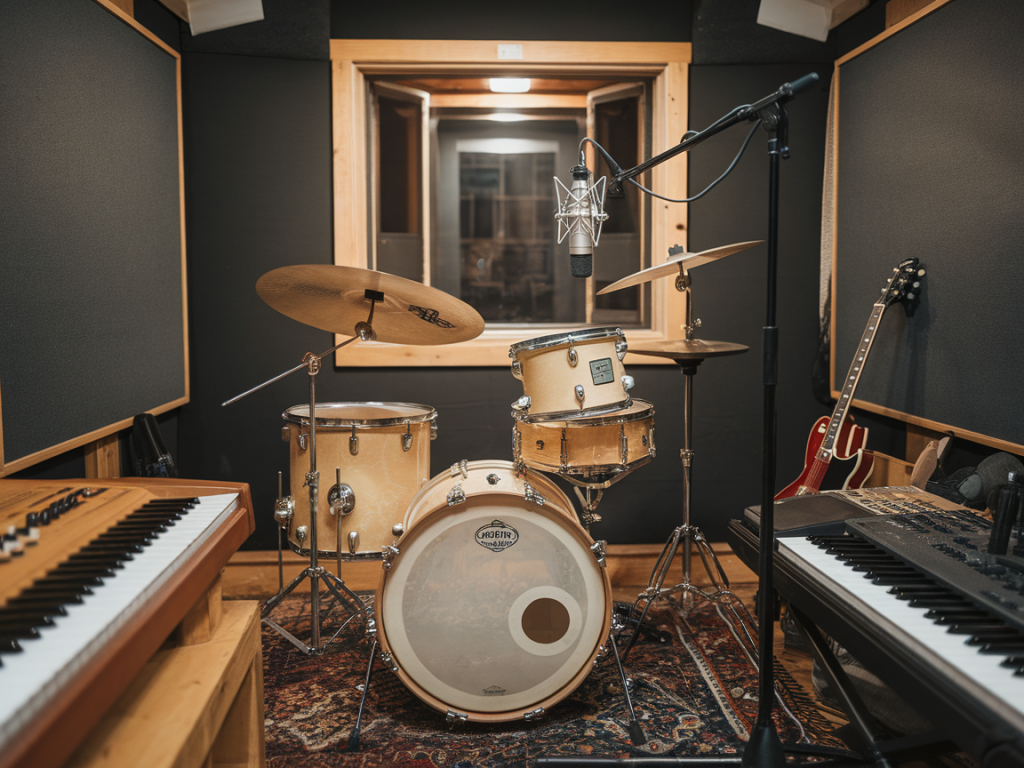
I want to show you a fast, practical way to get a 1970s "roomy" drum sound from a tiny home studio using just a single dedicated room mic plus three different stereo mic-pair options. The idea is not to imitate a huge studio exactly, but to capture that open, lived-in 70s vibe—big-sounding cymbals, warm low-mids, natural decay—while working within the limits of a small space and minimal mic count. I’ll walk through three mic-pair approaches (each gives a different flavour), placement and phase tips, and a single reverb trick that makes that one room mic punch well above its weight.
The mindset: what made 1970s drums sound roomy?
In the 70s you get a combination of: larger mic diaphragms and ribbon warmth, generous distance between mics and kit, soft-sounding plates/rooms and tape saturation. Engineers let more of the kit bleed into the overheads and room mics, then blended a warm ambient track under close mics. We can recreate the feeling by intentionally capturing a little more air and bleed, and then using one well-placed room mic to glue it with a tasteful reverb treatment.
Three mic-pair options (choose one to pair with your single room mic)
Each mic pair below is intended as your main stereo capture—overheads or stereo pair above the kit—then add a single room mic positioned to capture distance and decay. I’ll include practical placements and why each works for a 70s vibe.
- Large-diaphragm spaced pair (AKG C414 / Neumann U87 style)
Why: Spaced large diaphragms give a wide, open stereo image and a generous low-mid presence that's very forgiving. They capture cymbal shimmer and overall kit body in a vintage-friendly way.
Placement: Spaced about 60–90cm apart, 50–70cm above the rim height, angled slightly inward toward the snare. Start with a distance of ~1.2–1.5m from the snare and adjust for balance. In a tiny room you may need to pull them closer to avoid too much early reflection.
- Small-diaphragm XY or ORTF pair (Neumann KM184 / Shure KSM137)
Why: More focused and phase-coherent than a wide spaced pair; great if your room is modest but you still want a clear stereo image and defined transients. The 70s sound can be achieved by complementing these with a warmer room mic.
Placement: XY centered over the kit or ORTF at about 20–40cm above the cymbal plane. Point at the snare/between hats and ride for a natural drum-to-cymbal balance.
- Ribbon stereo pair (Royer R-121 / Coles 4038 or a Blumlein-style ribbon)
Why: Ribbons give that silky high-end roll-off and rich midrange that feels instantly "vintage". They tame cymbals and make the whole kit sit nicely in a mix without harshness.
Placement: Similar to the large-diaphragm pair but often a bit closer (60–90cm from the kit). Ribbons can be fragile, so keep them out of the direct path of loud hi-hat blasts and use windshields if needed.
Close mics and minimum wiring
For definition you still want basic close mics: a snare top (SM57/MD421), kick (dynamic like AKG D112 / Sennheiser 421 or a small condenser inside if you prefer), and maybe a top tom. But the magic is in the stereo pair + single room mic blending—so don’t overcomplicate the close mic chain.
Single room mic placement: the secret ingredient
This room mic is your "big ambience" track. In a small room, placement and mic choice matter more than distance. I like a single large-diaphragm condenser or a ribbon here—something that colours sound pleasantly (e.g., Neumann U87, AKG C414, Royer R-121, Coles 4038).
- Start around 2–3 meters from the kit if possible. If your room won’t allow that, go as far back as you can—the key is to capture the decay and reflections rather than the direct attack.
- Height matters: try 1–1.5m above the floor aimed slightly down at the kit centre; this picks up cymbal shimmer and floor reflections.
- Move the mic laterally to favour more cymbal or more kick/snare bleed depending on the vibe.
- Check phase with the close mics—flip polarity on the room mic and listen for impact differences. Choose the position and polarity that keeps snare and kick natural and full.
Phase and balance tips
Phase coherence is everything when you mix a distant room mic with close mics. Always:
- Record everything and flip the room mic polarity while listening in context—keep whichever setting gives the tightest snare and strongest kick.
- If the room mic is causing the snare to sound thin, nudge its track in your DAW by +/- 5–15ms to find better alignment.
- High-pass the room mic gently around 40–60Hz to remove sub rumble but preserve body; a mild low-cut keeps the room from muddying the low end.
The one reverb trick: turn your single room mic into a believable 70s room via "DIY convolution ambience"
This is the trick I use in tiny rooms to simulate a larger, 70s-style environment while keeping a natural, cohesive tone. The steps are practical and plugin-friendly.
- 1) Capture an impulse from your room mic
Record a handful of short, transient hits on the drums (a loud snare or hand clap) while only the room mic is active. Isolate a clean transient plus its decay—trim it so the initial transient is at the start and you include the tail. Save it as a WAV (1–3 seconds is fine).
- 2) Create a custom IR
Load that WAV into a convolution reverb plugin as an impulse response. Many reverbs (e.g., Altiverb, IR1, or free convolution plugins) allow you to import any audio file as an IR. What you’re doing is telling the reverb to use the sonic fingerprint of your room mic’s capture as the spatial template.
- 3) Use the custom IR as a send from your close mics
Send snare, overheads and a bit of drum bus to this convolution reverb. Because the IR is captured with your room mic, it retains that mic’s coloration and realistic decay—even if the physical room is tiny. This makes the close mics sit richly within the same "virtual" space.
- 4) Plate-mode processing and tape saturation
To sell the 1970s vibe, route the convolution reverb output through an emulated plate (UAD EMT250/Plate plugin or Waves Abbey Road Reverb Plate) with a medium-to-long decay (1.5–3s) and small pre-delay (10–20ms). Add light tape saturation (Slate VTM, UAD Ampex, or a simple tape plugin) on the send to emulate the compressive, warm character of tape-era rooms.
- 5) Stereo-widen the room mic
If you only recorded the room mic in mono, you can create stereo ambience by duplicating the convolution return, slightly offsetting one channel by 5–30ms and applying subtle EQ differences (a gentle high-shelf on one side, a mild low-mid bump on the other). This gives a believable stereo spread without weird phase artifacts.
Mixing the blend
Start with your close mics for clarity (snare, kick) and set the stereo pair at a level that gives cymbal life and kit image. Bring the room mic in as a taste—maybe -6 to -12 dB relative to the overheads. Then send the close mics to the convolution/plate chain and blend that under everything. A good starting point:
| Kick | Close mic heavy, little to no room send |
| Snare | Close mic for attack, room send and room mic for body |
| Overheads (pair) | Main stereo image; modest room mic level + convolution send |
| Room mic | Mono or processed stereo under everything for decay/air |
Compression: bus compression helps glue. Use a slow attack/medium release on the drum bus to let transients through then glue tails together. Gentle parallel compression on the overheads or bus adds thickness without killing dynamics.
Tone shaping—get that 70s warmth
- EQ: gentle lift around 200–400Hz for warmth, slight cut ~400–600Hz if boxy, roll off above 12–14k for vintage air instead of modern sheen.
- Saturation: tape or tube saturation on the drum bus and on the reverb send to taste.
- Delay: tiny slap delays (10–30ms, low feedback) on the reverb return can imitate modal echoes from larger rooms.
Finally: experiment. Small changes in room mic placement, a touch of pre-delay on the plate, or slight EQ differences between the convolution stereo sides can turn a flat home-studio drum recording into something that breathes like a 70s record. The convolution-from-room-mic trick ensures the ambience matches your mic tone, and the three mic-pair options give you different palettes—choose the one that suits the song and the kit.